Also Check Out: iOS Jailbreaking

Futurerestore Windows:
- Futurerestore Windows: Download Now!
- Gaster for Windows: Download Now!
- Zadig from Official Website: Download Now!
- Full Video Guide: Watch Now!
2. Download Zadig, Gaster and Futurerestore Windows
3. Get the device in DFU
4. Select device in DFU and replace the driver with LibUSBK
5. Use Gaster
6. Replace the driver to WINUSB again with Zadig
7. Go to device manager and delete the DFU driver
8. Scan for changes and now iTunes should detect your device. If not use Windows Update to get Apple USB driver.
9. Run Futurerestore with –use-pwndfu –set-nonce and all other flags and it will get stuck at red screen or in recovery mode with error “unable to find device”.
10. Again go to device manager and delete iBoot driver.
11. Again scan for new changes.
12. Now re-run Futurerestore without –use-pwndfu and –set-nonce but keep other flags. The restore will proceed and succeed.
Turdus Merula Linux:
💡 Tip: Xubuntu 22.04.5 LTS is a lightweight, fast, and reliable Linux distro:
🐧 Download Xubuntu 22.04.5 LTS ISO – Official Direct Link
Turdus Merula Downloads & Guides
A9(X) Tethered Downgrade Guide (Linux)
Tethered downgrade for A9/A9X devices
Installing Dependencies:
sudo apt update -y
sudo apt install libusb-1.0-0-dev libusbmuxd-tools libimobiledevice-utils usbmuxd libimobiledevice6 -y
Preparing Files:
sudo chmod +x ./ra1n_libusb
sudo chmod +x ./idevicerestore
Restart USBMUXD:
sudo systemctl stop usbmuxd
sudo usbmuxd -p -f
Step 1: Enter Pwned DFU Mode
sudo ./ra1n_libusb -ED
Step 2: Generate SHC block
sudo ./idevicerestore --get-shcblock [path_to_ipsw]
Step 3: Re-enter Pwned DFU Mode
sudo ./ra1n_libusb -ED
Step 4: Generate PTE block
sudo ./idevicerestore --get-pteblock --load-shcblock [path_to_shcblock] [path_to_ipsw]
Step 5: Re-enter Pwned DFU Mode again
sudo ./ra1n_libusb -ED
Step 6: Begin the downgrade
sudo ./idevicerestore -o --load-pteblock [path_to_pteblock] [path_to_ipsw]
Step 7: Perform tethered boot
sudo ./ra1n_libusb -TP [path_to_pteblock]
✅ Done! Your A9(X) device should now boot the downgraded iOS.
A10(X) Untethered Restore
Untethered restore for A10(X) devices
Step 0: Downloads
1. Latest Turdus Merula release
2. IPSW for your device from appledb.dev (must match your SHSH blob version)
3. Your SHSH blob file
Step 1: Find Generator (if needed)
cat [shsh blob].shsh2 | grep -A 1 "generator" # Take note of thevalue # Do NOT edit your blob
Step 2: Prepare Turdus Merula
cd turdusmerula
sudo chmod +x ./ra1n_libusb
sudo chmod +x ./idevicerestore
Step 3: Connect Device
1. Connect your device to PC
2. Trust the PC on your device
3. Enter DFU mode
Step 4: Enter Pwned DFU & Restore
sudo ./ra1n_libusb -EDb [generator]
sudo ./idevicerestore -w --load-shsh [shsh blob] [ipsw file]
Step 5: Follow Terminal Instructions
# Wait for restore to finish
# Terminal will guide the rest
✅ Done! Your A10(X) device should now be restored to the target iOS version.
A10(X) Tethered Downgrade Guide (Linux)
Tethered downgrade for A10/A10X devices
Installing Dependencies:
sudo apt update -y
sudo apt install libusb-1.0-0-dev libusbmuxd-tools libimobiledevice-utils usbmuxd libimobiledevice6 -y
Preparing Files:
sudo chmod +x ./ra1n_libusb
sudo chmod +x ./idevicerestore
Restart USBMUXD:
sudo systemctl stop usbmuxd
sudo usbmuxd -p -f
(Keep this terminal open/minimized)
Prepare Device (DFU → Pwned DFU)
sudo ./ra1n_libusb -ED
Restore Device:
sudo ./idevicerestore -o path/to/restore.ipsw
Boot Device:
sudo ./ra1n_libusb -t iBoot.img4 -i signed-SEP.img4 -p target-SEP.im4p
✅ Done! Your A10(X) device should now boot the target iOS version.
FutureRestore Linux/MacOS:
- Official Futurerestore Linux/MacOS Release: Download Now! or get Futurerestore Linux/MacOS with Segmentation Fault error fixed.
- Futurerestore Linux/MacOS for iOS 16.7.x to iOS 16.6/16.6.1 Downgrade: Video Guide
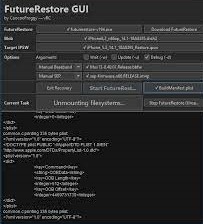
- Futurerestore GUI Linux/MacOS/Win: Download Now!
- Gaster for Linux/MacOS: Gaster-Linux | Gaster-MacOS
- A9 iPwndfu for Linux from: Official Github
- A10 iPwndfu for Linux: Download Now!
- All In One Downgrade Guide: Watch Now!

Legacy iOS Kit Downgrade:
- Legacy iOS Kit Downgrade: Official Github Page | Video Guide
Disclaimer: The content available on this website is for educational and informational purposes only. This website does not provide, advise, or cause any loss or damage to the viewer. All of the content is intended for educational purposes only under fair use.
I do not intend to promote stealing or illegal activities. Jailbreaking is 100% legal and is covered under the Digital Millennium Copyright Act (DMCA). Under this act, you can legally jailbreak your device. On this website, nothing illicit is shown and piracy is not promoted.
In Copyright Disclaimer Under Section 107 of the Copyright Act 1976, allowance is made for “fair use” for purposes such as criticism, comment, news reporting, teaching, scholarship, and research. Fair use is a use permitted by copyright statute that might otherwise be infringing. Non-profit, educational, or personal use tips the balance in favor of fair use.